Sinocrystal has already shared with you the material of FPC.
Here we would like to share the construction process of FPC with you. .
At first glance, typical flexible or rigid-flexible boards look pretty bland and uninspiring. However, getting them manufactured requires a few extra steps.
*Manufacture of any flex-rigid combination board starts with the manufacture of a single-sided or double-sided flexible board
*Manufacturing can start with a pre-pressed flex board, or it may start with a PI film
*Then laminate the original bare board with copper, or plated with copper skin
*The lamination process requires a thin layer of adhesive to be brushed on the film
*The adhesive-free process involves planting the "seeds" of copper plating on the film. This is usually done using a vapor deposition technique (e.g. sputtering) to seed the nodules for the subsequent chemical precipitation process
*The subsequent drilling, plating through and etching of single- or double-sided flexible boards is generally similar to the process for double-sided rigid boards.
The use of epoxy or acrylic adhesives, or sputter coating is the key to creating a thin copper coating.
Pressing the RA/ED copper foil layer onto the adhesive (this is the mainstream method) or using chemical plating methods.
The holes for vias and pads are usually mechanically drilled.
Multiple flexible boards can be drilled simultaneously by working turntables.
Using the same approach as rigid boards, pre-cutting of flexible boards can be implemented in conjunction with drilling, which requires more careful documentation, but alignment accuracy can be reduced.
Laser punching is typically used to handle ultra-small drill holes, which can add significantly to the cost, as each film needs to be drilled separately. Excimer (UV) or YAG (infrared) are used for high precision drilling (microvias), and CO2 lasers are used for medium sized holes (4 mils and up).
The use of stamping can handle large through holes and plate shears, but that is a separate processing step.
Once perforation is complete, copper is added to the holes using the same deposition and chemical plating method as for rigid boards.
The film surface is coated with a photo-sensitive resist, then exposed using the desired pattern, and the unwanted resist is removed before chemically etching the copper.
After the exposed copper skin is etched off, the resist is peeled off by chemical method.
The top and bottom of the flexible board are protected by a cut and shaped covering film. Sometimes there is a need to solder in some components on the flexible board, then the covering film plays the role of solder resist layer.
The most common cover film material is polyimide, which is bonded with adhesive, but here it is also possible to use a glue-free process.
In the adhesive-free process, the photo-sensitive solder resist is brushed onto the flexible board, which is the same process as for the rigid board. To reduce costs, screen printing can be used, followed by curing by UV irradiation.
One thing to note about the protective film is that it is usually placed on only a portion of the exposed flex circuit.
For rigid and flexible boards, the protective film is not placed on the rigid board unless there is a small overlap - usually about half a millimeter.
Of course the protective film can include the entire rigid section, but doing so would be detrimental to the rigid board's adhesion and z-axis stability.
This optional protective film is called a "bikini film" because it covers only the exposed portion.
In addition, the cover film in the components or connector pads to leave a cutout to retain at least two sides of the pad.
The final step in the manufacturing of flexible circuits is to cut. This is often referred to as "undercutting".
A high-volume, low-cost shearing method is to use a hydraulic press and a steel die. Although high-cost steel dies are required here, this method can cut out many flexible circuit boards at the same time.
For prototypes and small production runs generally use knife tooling. A very long blade is shaped to the contour of the flexible circuit board and then affixed to the base of the die (MDF, plywood or a thick plastic such as PTFE). By pressing the knife die, the flexible circuit is cut into shape.
For smaller output prototype manufacturing, you can use to X/Y cutter, somewhat similar to that used for vinyl signage.
If the flexible circuit board also has to be pressed with a rigid board to form a flexible and rigid board, which means that the flexible board and rigid board need to be pressed together. The same as the ordinary flexible board, it needs to be independently drilled, plated and etched. The difference is that it is thinner and more flexible due to the lack of glass fibers.
Less flexible boards can be manufactured with PI and glass fibers as required. Finally it has to be also pressed together with rigid board as a sandwich and made into a patchwork board.
Flexible circuit board is with rigid circuit board and other flexible board, hot pressed together by adhesive.
Each flexible board is not adjacent to each other.
In order to maintain flexibility, each flexible board has a maximum of 2 copper skin layer.
The flexible boards are separated from each other by rigid semi-cured sheets, substrates or PI core bonding sheets made of epoxy resin or and acrylate adhesives.
Essentially, each rigid sheet is cut separately in the part of the flexible sheet that is filled.
The flexible printed circuits have been embedded in the final assembly board, with the rigid board retained underneath the flexible circuits to support the flexible circuits. This helps keep the flex circuit flat during the soldering and assembly process.
If the flex circuit is not supported there are some potential hazards, such as flex circuit bending or large cracks during the soldering process, especially in reflow ovens.
Solder resist can be applied with a covering film similar to a pressure sticker or with the light sensitive solder resist coating mentioned earlier.
Finally, once the 6-layer board consisting of flexible and rigid board is pressed, the outermost (top and bottom) layers of copper foil are joined together. This is usually done by drilling holes from the top layer to the bottom layer and then coating. It is also possible to use a laser to drill blind holes (from the top layer to the flex or from the bottom layer to the flex), but this will increase the cost.
The final step is to print the top and bottom layers with solder resist, silkscreen and anti-corrosion plating (e.g., nickel dip) or solder homogeneous coating (HASL).
Finally, if you want to know more, please feel free to contact sinocrystal.
The 8 inch displays might be affected and delay for an accident.
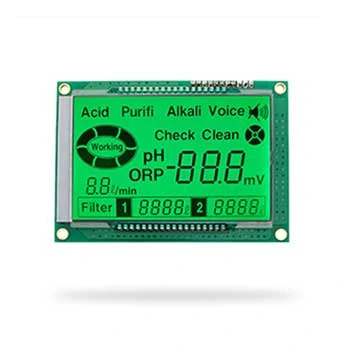
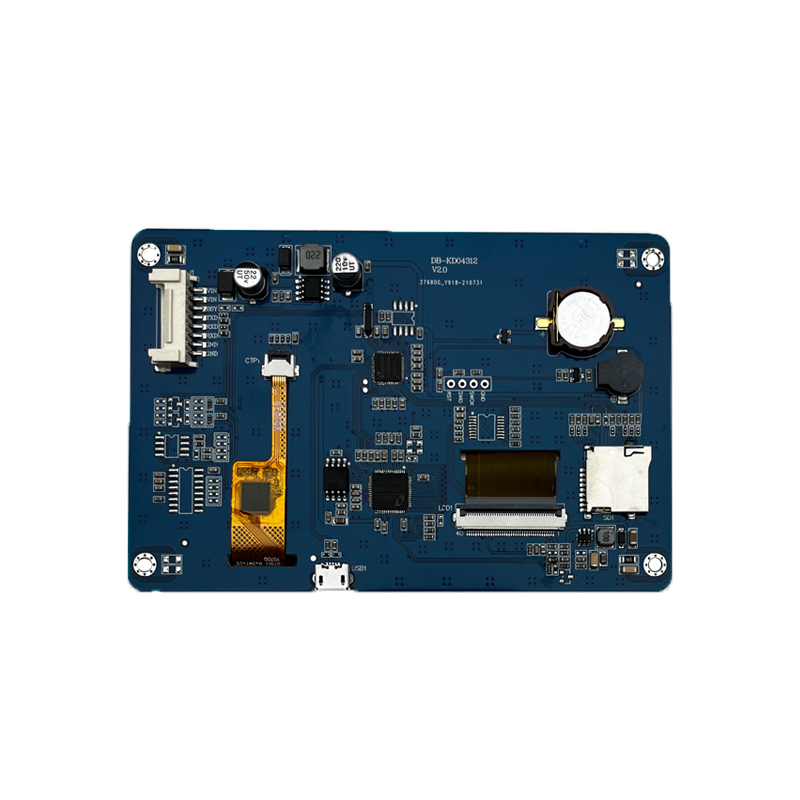
LCM, namely LCD display module and LCD module, refers to the assembly of LCD devices, connectors, peripheral circuits such as control and drive, PCB circuit board, backlight, structural parts, etc. In the home theater, LCD has become the mainstream, bringing joy to more families.
New iPhone 13 Series will use On-Cell OLED Displays. And it that will be launched in the second half of this year will be exclusively supplied by Samsung Display (SDC)
Top 10 LCD Display Manufacturers in China (2026 Guide for OEM Buyers)
Sinocrystal provides a secure and reliable packaging system for LCD displays, ensuring maximum protection against shock, moisture, and static electricity during global transportation.
Discover how LCD displays are evolving in industrial automation — from high-brightness and rugged designs to smart connectivity and energy efficiency. Explore what’s next for industrial-grade visual interfaces.
Discover the key factors to consider when choosing an LCD display for your project, including size, resolution, interface, brightness, and customization options from a factory-direct manufacturer.